

 There are some questions that always seem to come up in my conversations with my web design clients and blogger friends again and again.
Some of them are complicated. “How exactly do you make a living online?” is a question that needs more than a blog post to answer.
But they're not all that complex, and “I'm not sure how to credit images on a blog” is one that I hear a lot, tucked away at the end of a conversation. It's a throwaway question, asked hesitantly.
And you probably already know why.
Many of the questions that nag at us are ones we feel like we should already have answered.
So let's take a stand. Shame has no place in your blog or your business. (tweet it!)
That means we're going back to basics today, with a quick and simple formula on how to credit images on a blog or website. Because we're not going to let a little thing like this hold you back from success!
But let's take a step back and ask: why should you care?
I'm not talking about know why you think you probably should care. I know that you know that people made those beautiful images! And not for bloggers to harvest out of google images.
One of my favourite pieces of dating advice is the campsite rule: to leave the people you date in better shape than they were when you met them, and frankly the Internet needs more people acting this way too. So start being one of them today!
If you're a blogger, you're creating content of your own, and it's just as available to be copied or plagiarized as images are. And the bottom line is that if you wouldn't want someone republishing your posts under their name, you're doing the same thing when you use an image without crediting it.
There's no grey area on this when it comes to copyright. There is no disclaimer in your sidebar that means you're not liable. And as Author Roni Loren revealed on BlogHer in January 2015, even casual bloggers can be sued for thousands.
So, if you've ever used an image from Google Images, start removing them or deleting old posts. Even a few a day makes a difference.
And keep adding new posts using images that are the right side of the law.
Wondering How You Should Credit Images? Swipe My Formula!
The best part about this is that it's really simple. Here's exactly how you should credit images.
When You Know Who Made It & Have a Link to the Original:
Image by Artist / Photog Name, linked to where it was originally posted
How This Looks “In The Wild”
If you were going to use this image from my Instagram feed in your post, you would credit it directly under the image like this:
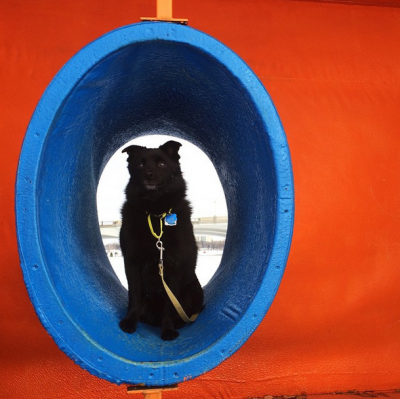
Image by Kyla Roma
Why This Works:
- The creator's name is clearly shown by the image. Kyla Roma's Instagram Account or a variation would be equally correct.
- The link takes you directly to the earliest original source you can find.
- The link goes beyond linking to Instagram.com, KylaRoma.com, or a user's profile URL and links directly to the to the original post or page where you found the work.
.
When You Know Who Made It, Have a Link to the Original and Found It Through Another Website:
Image by Artist / Photog Name, linked to original image via Where you found it, linked to that
How This Looks “In The Wild”
If you were going to use a different image of my dog Mal from my husband's (video game filled!) Instagram feed in your post, and you found it through the post you're reading now, you would credit it directly under the image like this:
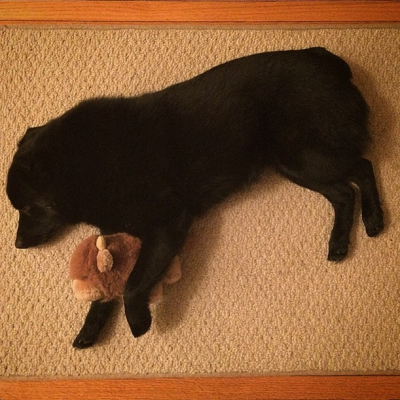
Image by Broximar via Kyla Roma
Why This Works:
- The creator's name is clearly shown by the image.
- The link takes you directly to the earliest original source of the image you can find.
- The link goes beyond linking to Instagram.com, KylaRoma.com, or a user's profile URL and links directly to the to the original post or page where you found the work.
- The way you found the image is clear, which is especially helpful when you're sharing work found through a favourite blogger's roundup posts or a news site.
If You Took the Photo:
Go crazy! This is one of the best reasons to work on your photography skills as a blogger. I took the image for this post at a museum, and because the work is over 70 years old copyright isn't a factor.
Otherwise…
If there's a grey area, don't post it. Don't waste time, or risk it – find a picture that works, and keep moving on up.
It's next to impossible to find a blogger who has a perfect record, we were all beginners once after all. (Myself included!) But this is an aspect of blogging where you can take a limitation and use it as motivation to be as professional as possible. If you make a strong foundation, who knows where you could end up!
Where do you get confused by image crediting? Have you had experiences with people swiping your work, or do you have questions?
I'm not a lawyer, but I've been on the Internet long enough to have had my writing, photography, and even a few of my complete blog designs plagiarized. I'm happy to share my experiences in the comments if they're helpful.

LAST UPDATED ON: May 27th, 2020
CATEGORY: Content Marketing Strategy
hi KYLA ROMA!
I have a question
If I take a screenshot of a YouTube video and use it on my own website, and give proper credit is that legal?
I’m not a lawyer so I can’t speak to that, but my best guess would be to provide complete credit to the creator. I do what well-regarded academic style guides, like APA or MLA recommend when I’m not sure. You can click here to see how you cite a YouTube video in MLA style. Hope that helps!
Hi! I am a new blogger as well. I wanted to add pictures of tv show title pages actually for an educational purpose so I’m sure I’m within fair use, but what are strategies for finding the original or how I would cite these images? Would I credit the writers of the show or just the tv network as a whole? I’m really confused by everything I’ve been reading! Please send help!
Destiny Jones
That’s a really interesting question! Whenever I’m not sure, my favourite resource is to use the Owl at Perdue guidelines on how to cite sources in APA style.
This is how to cite to audiovisual information – including a TV show.
This is an academic website, and it’s one of the standards that’s used in Universities and in scientific papers. I like APA style the best because I find it to be simple and widely used – and it’s what my University encouraged so I’m familiar with it. It’s incredibly well documented so if you’re ever stuck, you can circle back there and find a great example. My logic has been that if it’s good enough for a PhD thesis, it’s good enough for me! lol
For this case, I’d cite the Television show as a whole, since all of the visuals are part of the series. If you’re unsure about more granular details, the end credits of the show will include detailed copyright information, down to the music, and anything under copyright that’s included in the show content. Hope that helps!
Hi Kyla
my name is Abhinav I’m a new blogger. Can I use shutterstock images in my blog by giving a credit? Please a reply I’m waiting for reply
Thanks for commenting! Shutterstock images, and other stock image websites, will all have their own terms and conditions listed so you know exactly how to use them. Try searching their FAQ section. Once you purchase the image, most stock websites don’t need you to credit the image. If you’re looking for a work around to find free images, I would recommend using a free stock website. Shutterstock specifically has watermarks over their images that are only removed by purchasing the images, so using theirs without paying – even if you credit them – would be extremely distracting. I’d strongly recommend against it.
Great post, Kyla. I’m a Photo Researcher (yes, a real job with capital letters! And yes, someone pays me to do exactly this – find photos for published content and make sure it is licensed for use.)
It is always best to err on the side of caution when using an image. Usually an email with a request for permission is the best way to begin.
Otherwise, sites with free-to-use, license-free images ABOUND on the internet, such as Pixabay.
If you’re looking for something more specific (say, a movie still, as one of the commenters here suggested), there are stock photo agencies that represent photographers and other content creators, from the Walmarts (Getty Images) to the boutique (AnimalsAnimals – guess what kind of photos they license?).
If you really need to use a really particular image, and you can’t easily track down the copyright holder, well – it’s probably cheaper to hire a Photo Researcher than to pay on a copyright infringement suit!
Thank you for this insight, Nicole! I love hearing your perspective. It’s so crucial that we take this stuff seriously!! “I got it form google” doesn’t cut it at all, and there have never been more places to get great images with easy to read licenses. I had no idea that there’s a specific animal stock site! That made my day.
Oh my god, I’ve been (re)searching for this information for months! I came across similar content last year but was unable to find the information again when I needed it. Thanks so much. I didn’t think it would be that hard to find a clear answer given the issues around IP and the risks attached to using someone else’s content when you’re not supposed to.
Hi Kyla,
Great post, thanks for this! I’m beginning a DIY and design blog, so I’ve been doing much research on this subject. Especially when blogging about design concepts that include images of what others have done with interior spaces. What about if the original creator, designer and source are cited, but you still don’t know if this is allowed due to no image use instructions being found? I find it easy to locate the original source and creator, but many do not detail any image use instructions or permission on their sites. Does this mean that citing the image correctly is enough? Again, thank you for tackling this subject
Great question! My instinct is that most bloggers I know would say yes, that citing the image source and creator is enough as long as there isn’t anything prohibiting sharing on the creator’s website. That being said, I also know bloggers who have higher standards and won’t share an image unless the creator has personally approved that specific use. In my experience, most people are happy to have their work shared but I draw the line at editing other people’s images, adding text to them or using them as images to promote my posts. It’s a personal decision that we all need to make for ourselves. I hope this post has made it easier for you to decide where you fall!
Thanks Kyla! This helps indeed.
Hi there. I followed a link from Susannah Conway’s page. I just wanted to add that there are some really great sites out there that feature photography free for use, licensed as Creative Commons Zero, which means free for use, including commercial. The one I’m specifically thinking of is unsplash. They have some amazing high-resolution images.
My understanding is that crediting the artist or photographer doesn’t necessarily protect you from copyright violation. For example, artists that use photographs for reference would be violating copyright laws if they tried to sell the painting they made based on that photograph, unless specific permission was given.
Intellectual property is a very contentious issue. Thanks for the post!
Thank you for commenting, Roxanne. That’s a great point about paintings based on photographs. Copyright violation and IP aren’t straightforward, but it is fascinating! It can feel really intimidating for that reason, but I hope that this post can provide an access point for bloggers and content creators who are intimidated by this area so they can start taking action in a way that supports other creators. Your knowledge is a fabulous help with that, thanks again for weighing in!
So if I find a picture on google and it takes me to someone’s blog website do I credit that? And if so how do credit it? And is it ok to credit something from Google?
While I completely agree with you for ethical reasons, the post you linked to says it doesn’t matter if you do give credit to the original photographer, it still breaks copyright :-(
Thanks for pointing that out, Kat! There’s a lot to take into consideration for all of this, isn’t there? My understanding is that it depends on how tightly the creator holds onto the rights of their work. If there’s a a warning against use of the images on their site, it’s our responsibility to stick with that.
It’s all made complicated by how much sharing is built into the online world. Many brands and businesses don’t mind fan art because it’s free PR. Many artists would love to have a chance a to have their work seen on a large stage for free. Others would see that as a profound violation. In all cases, it’s best to contact the creator and request permission directly. They aren’t being inundated with those requests!
The idea here was to look at the bad habits that some bloggers fall into that are easy to fix with a little effort, and to make it easier for the, to do something positive. It’s not a definitive guide, but hopefully it helps.
Great post! I’ve always wondered about this and wasn’t sure if I was doing it right! So here’s another variation on this theme … say I want to help promote an event or something that I saw on another website … can I use their picture to help them promote if I give them the credit? Also, do I save the picture and host it myself on my blog or do I upload it as a link from their website (this doesn’t seem right as I would be stealing their bandwidth)?
Hi Jessica! Great question, thanks for asking. This is probably the kind of event that someone would be thrilled for you to share online, especially if you’re sharing an official image that’s been designed to share information about it.
If you’re sharing that kind of an image with a link back to the official site where someone might be able to buy tickets, the creators would probably be thrilled. Just credit anyone who’s credited as the poster designer, if one is listed, and link to the official page.
If you’re ever unsure, you can always email and ask for permission, but promotional materials are there for exactly this.
I blog mostly about movies & TV on my blog. This includes a lot of screen shots that I’ve taken of a movie or episode as I watched it. Do you have any tips or rules for those kind of images? Or am I just straight-up violating some copyright laws? :/
Related: If I were to use a screen shot or gif, and I’ve found the earliest original source (ie. the Tumblr user who made a gif) do I need to/how do I also properly credit the movie/TV show itself?
This post was helpful, thanks!
No worries, Tish! I’m glad it was helpful. I wasn’t even thinking about that, but there are whole communities based around creating gifs and blogging pop culture. And technically, all that is breaking copyright.
At the same time, if there were no Drag Race or Parks and Recreation gifs, I don’t know that the world would be a place I want to be.
My feelings about those shows aside, from what I’ve seen the creators of movies and television shows seem to view this as fan art. When they’re doing the math, I imagine that the PR drawbacks of bringing cases against their fans probably outweighs the benefits of protecting their work in the strictest way possible.
A great example of the difference here is that while a TV show or movie benefits from exposure, the creators generally don’t want sections of it added to youtube or available for download because viewing the entire work is the way that experience is monetized.
You can a also companies that licence photos, for example, of celebrities attending a launch for a Hollywood event. If you use one of those images on your site, because that is the photographer’s complete, finished work, you could be billed for what you should have paid for it to begin with.
It’s all fairly nuanced, but I hope that helps add a little more depth to the conversation. I’m not a lawyer, but I’m fascinated by this stuff!
So i cam use a Netflix series screenshot.and give credit to Netflix under the image and that’s it?
Not exactly. You can click here to find out how to credit a show on Netflix using MLA style. You need to be more specific about the creators of the show, the series, and the episode. I’m not a lawyer, but if you just credited Netflix under the image you’d be violating copyright, as I understand it.